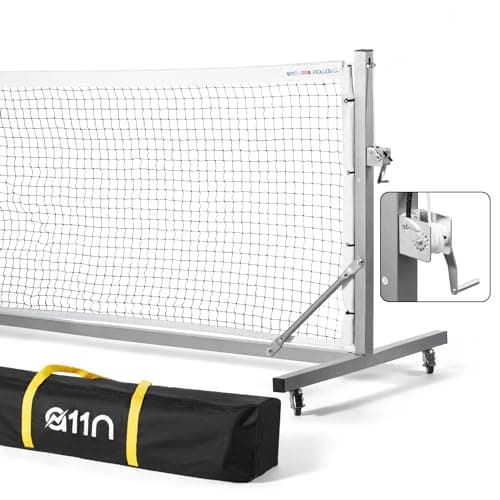
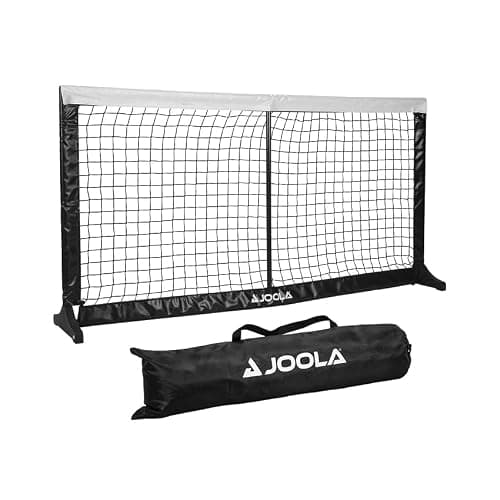
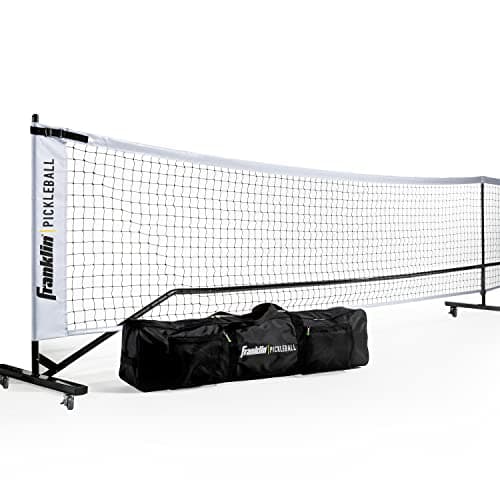
Portable pickleball nets all go up the same way — centre post or centre bar first, then work outward, then tension last — and the only step that needs care is the final one: 36 inches at the sidelines, 34 inches at the centre, checked with a tape measure rather than by eye. If you are still choosing a system, the thing that most changes how this job feels is whether the frame needs tools. The Franklin system is tool-free and the easiest of our three to put up repeatedly; the A11N Pro states plainly on its own listing that tool assembly is required, and buys you a hand winch for tension in exchange.
This page is for the net you have just unboxed and for the one you take out of a bag every Saturday — two different jobs. The first assembly is slower and happens once. After that, the frames on all three of our picks break down to parts that go back up quickly, and the wheeled systems do not break down at all; you roll them.
03The buyer's guide
The order that works
1. Lay everything out and find the centre
Unpack onto the surface you will play on, not onto grass next to it, and separate the posts from the horizontal bars. Nearly every portable system is built outward from the middle, so identify the centre piece first. If your net has a centre strap or a centre upright, that is the part that will set your 34 inches later — do not leave it off because the net looks fine without it.
2. Build the frame before you attach the net
Assemble the full frame — posts and base bars — standing but untensioned. Fighting a net that is already attached while you are still clicking poles together is how poles get bent. On the Franklin system this is the tool-free part: the sections push and lock. On the A11N, this is where the tools come out, and it is a one-time job if the net lives on its wheels afterwards.
3. Attach the net, then tension it
Hook or sleeve the net onto the frame with the frame still slack, then take up the tension. A11N's system uses a manual hand winch it describes as giving controlled tension adjustment for a straighter net profile, which is genuinely the easiest way to get a taut net and the main reason to pick it. Systems without a winch rely on the frame geometry and a tension cord, and you get there by small adjustments at both ends rather than one big pull at one end.
4. Measure. Do not eyeball.
Put a tape on it: 36 inches at each sideline, 34 inches at the centre. This is the step that separates a net that plays right from one that quietly teaches you the wrong trajectory. A net that sags to 32 inches in the middle makes your drives look better than they are, and the correction is not free once the habit is in. Nets marketed with an "anti-sag" frame — the A11N uses that phrase — are addressing exactly this, and even then it is worth checking.
5. Lock the wheels, square it up
Wheeled systems roll, which is the point and also the hazard. The A11N has six lockable wheels; lock them before the first serve. Then stand behind one baseline and check the net is square to the court rather than a degree or two off — on a driveway with no lines, a long straight reference like the garage door or a kerb is easier to trust than your eye.
How the three systems differ in practice
| System | Assembly | Tension method | Moving it | Best when |
|---|
| Franklin Net System | Tool-free, assembles and disassembles in minutes per its listing | Frame geometry, no winch | Wheels; 27 lb steel frame | The net goes up and down often |
| A11N Pro Net | Tool assembly required | Manual hand winch | Six lockable wheels | The net lives in one place and gets rolled |
| JOOLA Compact Practice | Tool-free, sets up in minutes | Lightweight frame, no winch | Carried; packs into its bag | Garage and driveway practice, not games |
Five things that go wrong
Setting up on an uneven surface. A driveway that slopes for drainage will put one sideline higher than the other. Measure both, and if they disagree by more than an inch, shim the low foot rather than retensioning the net.
Over-tensioning. A drum-tight net pulls the posts inward and bows the top bar. Taut enough that the ball does not die in the mesh is taut enough.
Leaving it out. Nylon mesh and steel frames both survive weather better than UV. If the net lives outside, the bag is not decoration.
Forgetting the court. The net is the easy half. A proper court needs the non-volley zone marked seven feet either side of it — see court dimensions and the kitchen rule for why that line matters more than the baselines.
Buying the wrong width in the first place. No amount of careful setup fixes a 14-foot net at a doubles game. Our net sizing guide covers that decision, and the best portable nets is the ranked list.